Remove o Gerenciador de rede gráfico do Gnome 1.
sudo apt-get remove --purge network-manager network-manager-gnome network-manager-pptp network-manager-pptp-gnome
Para o funcionamento do LTSP 4.2, é preciso alguns programas. rpcbind nfs-kernel-server
sudo apt-get install isc-dhcp-server tftpd-hpa rpcbind nfs-kernel-server
Pra usar o ltsp-utils instalar bibliotecas do perl
sudo apt-get install libwww-perl libhtml-parser-perl libhtml-tagset-perl libhtml-tree-perl liburi-perl
Vamos instalar o ltsp-utils, com ele instalamos e configuramos o LTSP 4.2.
http://ltsp.mirrors.tds.net/pub/ltsp/utils/ ou https://www.idsorocaba.tk/ltsp/utils
wget https://www.idsorocaba.tk/ltsp/utils/ltsp-utils-0.25-0.tgz
tar xvf ltsp-utils-0.25-0.tgz
cd ltsp-utils
sudo sh install.sh
Installing ltspadmin
Installing ltspcfg
Installing ltspinfo

Installation of ltsp-utils complete
No Ubuntu/Debian o pacote ltsp-utils năo é mais oficial, por isso pegar o fonte para instalar.
Obter a .iso
http://ltsp.mirrors.tds.net/pub/ltsp/isos/ - ou https://www.idsorocaba.tk/ltsp/isos/
Baixar e montar .iso do LTSP4.2
wget https://www.idsorocaba.tk/ltsp/isos/ltsp-4.2u2-0.iso
sudo mount -o loop ltsp-4.2u2-0.iso /mnt
Abra o #ltspadmin
sudo ltspadmin
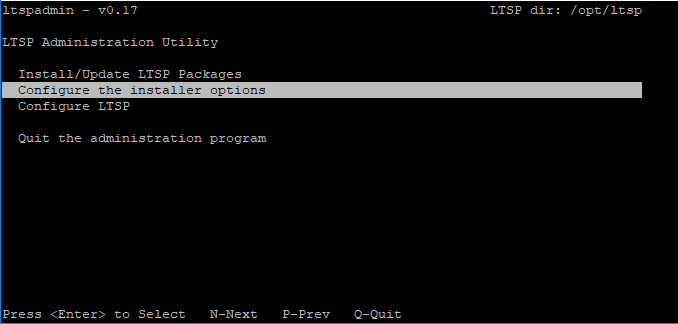
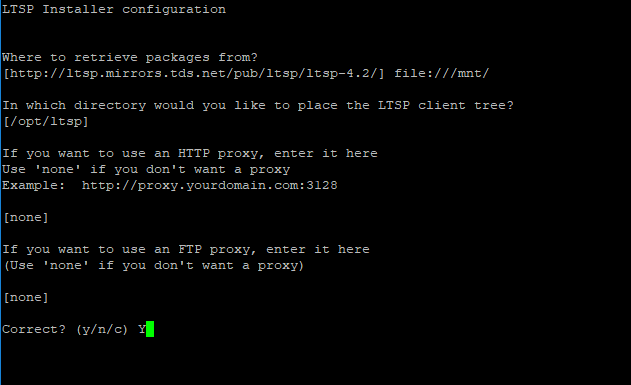
Na tela do ltspadmin vamos primeiro em Configure the installer options
Em Where to retrieve packages from? vamos trocar e colocar:
file:///mnt/
na opçăo abaixo In which directory would you like to place the LTSP client tree?
[/opt/ltsp]
Indicado manter o padrăo e pra outras pode deixar em branco e dar enter.
Para instalar vamos em Install/Update LTSP Packages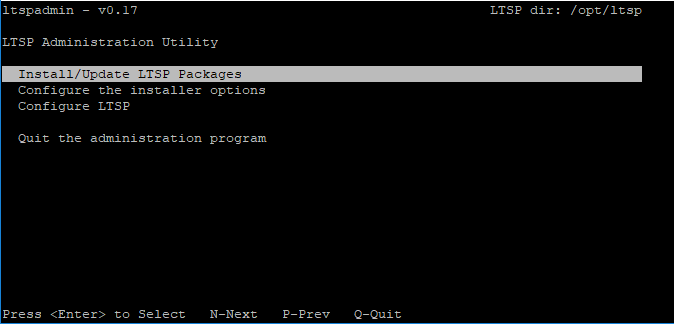
Tecle A para selecionar todos arquivos para instalaçăo
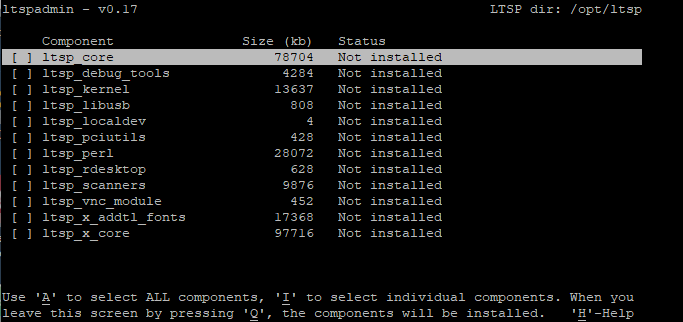
e Q para começar o Download
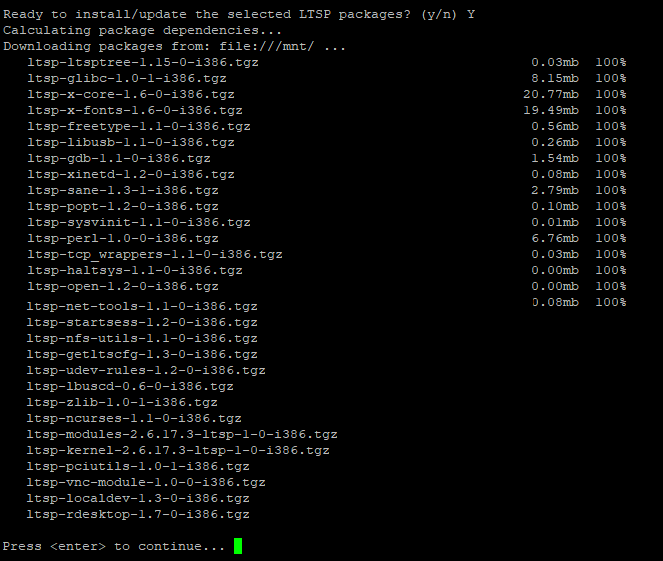
Instalou e tecle Enter para continuar
Com LTSP já instalado, falta somente configurar...mas antes vamos editar/verificar se alguns arquivos estăo como devem.
Configurado Interface de Rede
O servidor deve ter duas placas de rede, vamos usar aqui no exemplo a eth1 com ip 192.168.20.1 para o LTSP
Para isso vamos abrir o:
sudo nano /etc/network/interfaces
E colocar a seguinte configuraçăo na eth1 deste jeito.
auto eth1
iface eth1 inet static
        address   192.168.20.1
        netmask   255.255.255.0
        network   192.168.20.0
        broadcast 192.168.20.255
depois executar...
sudo service networking restart
sudo ifconfig eth1 192.168.20.1
Configurado o Runlevel
Criar o arquivo inittab, isso năo vai afetar o Ubuntu que usa outro sistema, mas somente ter este arquivo pra continuar a instalaçăo do LTSP4.2, sem mensagem de erros.
sudo su
Ficar como root, e ai executar
echo "id:5:initdefault:" > /etc/inittab
Com isso se cria o arquivo inittab com valor id:5
Ver Configuraçăo atual do LTSP
Para ver como esta a configuraçăo atual do LTSP
sudo ltspcfg
tecle S e veja se tem tudo instalado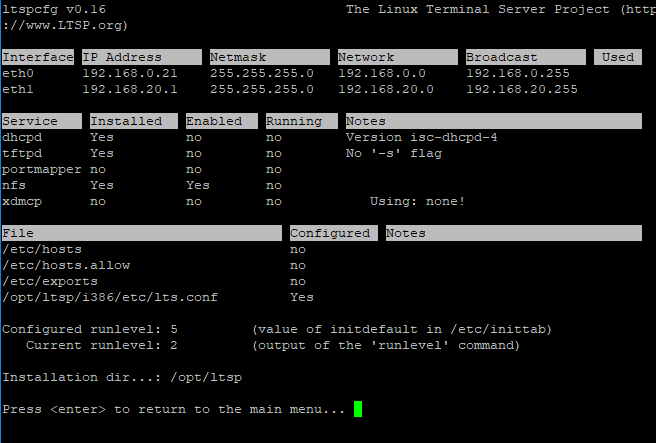
Maiores informaçőes:
2.5. Exibindo a configuraçăo atual
http://ltsp.mirrors.tds.net/pub/ltsp/docs/ltsp-4.1-ptbr.html#AEN641
Configurando os serviços necessários ao LTSP
Em sudo ltspcfg Tecle C (configure)
Maiores informaçőes:
2.3. Configurando os serviços necessários ao LTSP
http://ltsp.mirrors.tds.net/pub/ltsp/docs/ltsp-4.1-ptbr.html#AEN443
1 - Runlevel
Entrar e confirmar que esta em runlevel igual a 5
2 - Interface selection
Entrar e escrever a interface/placa de rede que LTSP vai usar.
Vamos aqui usar a eth1 que antes já configuramos
3 - DHCP configuration
Entre e criei o arquivo dhcpd.conf
Do you want to build a dhcpd.conf file (y/n) ? Y
em outro Terminal/Aba faça
sudo cp /etc/dhcpd.conf /etc/dhcp/dhcpd.conf
E agora edite o dhcpd.conf
sudo nano /etc/dhcp/dhcpd.conf
Na primeiras comentar a linha onde esta:
ddns-update-style ad-hoc;
ficando
#ddns-update-style ad-hoc;
e procure por:
option domain-name "your_domain.org"; # You really should fix this
e coloque o domínio da sua rede.
Sugestăo usar "ltsp"
option domain-name "ltsp"; # You really should fix this
procure a linha - subnet 192.168.0.0 netmask 255.255.255.0
 subnet 192.168.0.0 netmask 255.255.255.0 {
 range 192.168.0.100 192.168.0.199;
 if substring (option vendor-class-identifier, 0, 9) = "PXEClient" {
 filename "/lts/2.6.16.1-ltsp-1/pxelinux.0";
 }
 else{
 filename "/lts/vmlinuz-2.6.16.1-ltsp-1";
 }
 }
Verifica se esta com o ip de sua rede configurada na eth1.
Em um Terminal/Aba execute: ls /tftpboot/lts e veja o retorno.
# ls /tftpboot/lts
 2.6.17.3-ltsp-1 vmlinuz-2.6.17.3-ltsp-1
No dhcpd.conf criado esta escrito a versăo - 2.6.16.1-ltsp-1 - só que ltsp tem instalado a: 2.6.17.3-ltsp-1.
Mude para 2.6.17.3-ltsp-1.
- tail -f /var/log/syslog
Jan 17 20:55:10 Balaio1 in.tftpd[4606]: RRQ from 192.168.20.102 filename /tftpboot/lts/vmlinuz-2.6.17.3-ltsp-1
Jan 17 20:55:10 Balaio1 in.tftpd[4606]: sending NAK (1, File not found) to 192.168.20.102
Remover no dhcpd.conf o /tftpboot/ se tiver
filename "/tftpboot/lts/2.....
deixando como:filename "/lts/2......";
Agora faça as mudanças no option domain-name, subnet e no filename -, o dhcp.conf deve ficar assim.
# dhcpd.conf

# ddns-update-style ad-hoc;

 option subnet-mask 255.255.255.0;
 option broadcast-address 192.168.20.255;
 option routers 192.168.20.1;
 option domain-name-servers 192.168.20.1;
 option domain-name "ltsp"; # You really should fix this
 option option-128 code 128 = string;
 option option-129 code 129 = text;


 get-lease-hostnames true;

 next-server 192.168.20.1;
 option root-path "192.168.20.1:/opt/ltsp/i386";

 subnet 192.168.20.0 netmask 255.255.255.0 {
 range 192.168.20.100 192.168.20.110;
 if substring (option vendor-class-identifier, 0, 9) = "PXEClient" {
 filename "/lts/2.6.17.3-ltsp-1/pxelinux.0";
 }
 else{
 filename "/lts/vmlinuz-2.6.17.3-ltsp-1";
 }
 }
#
# If you need to pass parameters on the kernel command line, you can
# do it with option-129. In order for Etherboot to look at option-129,
# you MUST have option-128 set to a specific value. The value is a
# special Etherboot signature of 'e4:45:74:68:00:00'.
#
# Add these two lines to the host entry that needs kernel parameters
#
# option option-128 e4:45:74:68:00:00; # NOT a mac address
# option option-129 "NIC=ne IO=0x300";
#
Feito tudo...execute.
sudo service isc-dhcp-server restart
stop: Unknown instance:
isc-dhcp-server start/running, process 10645
dhcp3 ligou corretamente.
Voltar ao Terminal/Aba que tem o Menu de Configure
4 - TFTP configuration
coloque **Y** (yes ) para ligar/enabled o TFTP
Em outro Terminal/Aba antes edite:
sudo nano /etc/default/tftpd-hpa 1
E deixe o arquivo tftpd-hpa deste jeito...
# /etc/default/tftpd-hpa

TFTP_USERNAME="tftp"
TFTP_DIRECTORY="/tftpboot"
TFTP_ADDRESS="192.168.20.1:69"
TFTP_OPTIONS="--secure --listen -r blksize -vvvvvv"
Salva e restart no serviço:
sudo service tftpd-hpa restart
tftpd-hpa stop/waiting
tftpd-hpa start/running, process 10900
Para confimar se esta rodando...
sudo service tftpd-hpa status
ou
netstat -a | grep tftp
E pode continuar a instalaçăo.
5 - Portmapper configuration
coloque Y (yes) para ligar/enabled.
portmap is the daemon that converts RPC Program numbers to DARPA protocol
port numbers.  This is needed for NFS and NIS to function properly.  The
clients will query the portmapper daemon to figure out which ports to connect
to for the various services.


The portmap package is not installed!

Please install it, and then come back here and enable it.
Press <enter> to continue..
6 - NFS configuration
coloque Y (yes) para ligar/enabled.
Step 1: Enabling the nfs daemon

Configuring nfsd to start at boot time

It seems this is a Debian based system;
portmap is already configured to start, nothing to do.
Press <enter> to continue..
7 - XDMCP configuration
sudo apt-get install gdm
Quando se entra, se tem a mensagem:
Xdmcp is the protocol used by a display manager to present
a login dialog box on the workstation.


The Xdmcp service is not installed!

Please install it, and then come back here and enable it.
Press <enter> to continue..
Crie o arquivo:
- nano /etc/gdm/custom.conf
Com o seguinte conteúdo.
# /etc/gdm/custom.conf

[daemon]
User=gdm
Group=gdm

[security]
DisallowTCP=true

[xdmcp]
Enable=true
DisplaysPerHost=2
HonorIndirect=false
MaxPending=4
MaxSessions=16
MaxWait=30
MaxWaitIndirect=30
PingIntervalSeconds=60
Port=177

[greeter]

[chooser]
Multicast=false

[debug]
Enable=false
LightDM
- https://wiki.ubuntu.com/xdmcp
- https://wiki.archlinux.org/index.php/XDMCP#LightDM
- https://askubuntu.com/questions/66431/how-do-i-configure-lightdm-to-work-with-xdmcp
8 - Create /etc/hosts entries
Entrar, confiar com Y (yes) para criar entrada no /etc/hosts:
It is important that several services running on the server
are able to map an IP address back to a hostname.  This is
typically referred to as "reverse mapping".

There are 2 common ways to achieve this:

  1) Entries in /etc/hosts for each workstation.

  2) Reverse mapping entries in DNS.

If you have (or will) setup your DNS server to do the proper
reverse mapping for each workstation, you can skip this
configuration step.  Otherwise, it is recommended that you add
entries to the /etc/hosts file for each workstation.

Do you want to add entries to /etc/hosts (y/n) ? Y

Finished adding /etc/hosts entries.

Press <enter> to continue..
9 - Create /etc/hosts.allow entries
Entrar, confiar com Y (yes) para criar entrada no /etc/hosts.allow:
Some services, such as dhcpd, tftpd and portmap use a security feature
called 'tcpwrappers'.  This feature restricts connections from any
host addresses specified in /etc/hosts.deny, and allows connections
from host addresses specified in /etc/hosts.allow.

ltspcfg can add the necessary entries to /etc/hosts.allow for you.

Do you want to add entries to /etc/hosts.allow (y/n) ? Y

Finished adding /etc/hosts.allow entries.
Em outros Terminal, vamos editar o arquivo
sudo nano /etc/hosts.allow
bootpd:     0.0.0.0
in.tftpd:   192.168.20.0
portmap:    192.168.20.0
mude para ip que tu tem configurado no seu servidor. No caso aqui: 192.168.20.1
bootpd:     0.0.0.0
in.tftpd:   192.168.20.1
portmap:    192.168.20.1
Salve e pronto.
10 - Create /etc/exports entries
Entrar, confiar com Y (yes) para criar entrada no /etc/exports:
To tell the NFS system which directories to make available, entries
must exist in /etc/exports, for each directory.  With each entry, is
information about which machines are allowed to access the directory,
and what permissions they will have.

ltspcfg can add the necessary entries to /etc/exports for you.

Do you want to add entries to /etc/exports? (y/n) ? Y

Finished adding /etc/exports entries.

Press <enter> to continue..
Em outros Terminal, vamos editar o arquivo:
sudo nano /etc/exports - mudando para o ip do servidor. 192.168.20.1 Deve ficar assim:
## LTSP-begin ##
#
# The lines between 'LTSP-begin' and 'LTSP-end' were added
# on: Qua Abr 18 23:57:57 2007, by the ltspcfg configuration tool.
# For more information, visit the LTSP homepage
# at http://www.LTSP.org
#

/opt/ltsp                 192.168.20.1/255.255.255.0(ro,no_subtree_check,no_root_squash,sync,no_subtree_check)
#/var/opt/ltsp/swapfiles   192.168.20.1/255.255.255.0(rw,no_root_squash,async,no_subtree_check)

## LTSP-end ##
11 - Create lts.conf file
Entrar, confirmar com Y (yes) para criar arquivo lts.conf:
Do you want to create a default lts.conf file (y/n) ? Y

Finished adding /opt/ltsp/i386/etc/lts.conf entries.

Press <enter> to continue..
Abaixo vamos editar algumas configuraçőes que ltspcfg criou.
sudo nano /opt/ltsp/i386/etc/lts.conf
[Default]
        SERVER             = 192.168.20.1
        XSERVER            = auto
        X_MOUSE_PROTOCOL   = "PS/2"
        X_MOUSE_DEVICE     = "/dev/psaux"
        X_MOUSE_RESOLUTION = 400
        X_MOUSE_BUTTONS    = 3
        USE_XFS            = N
        SCREEN_01          = startx
Pronto....reinicie a maquina e faça os teste nos terminais.